SELECT name, email, COUNT(*) FROM users GROUP BY name, email HAVING COUNT(*) > 1
Finding duplicates with SQL
Reply

SELECT name, email, COUNT(*) FROM users GROUP BY name, email HAVING COUNT(*) > 1
Für München Pendler: https://pendlerinfo-mering.de/ oder https://marudor.de/Mering
| Montag: | 15.00 – 19.00 Uhr |
| Dienstag: | 15.00 – 19.00 Uhr |
| Freitag: | 09.00 – 17.00 Uhr |
| Samstag | 09.00 – 16.00 Uhr |
| Mo. & Mi.: | 15.00 – 18.00 Uhr |
| Di.: | 10.30 – 13.00 Uhr |
| Do.: | 15.00 – 20.00 Uhr |
| Fr.: | 10.30 – 18.00 Uhr |
| Baywa Mo. – Fr.: | 08.00 – 18.30 Uhr |
| Baywa Sa.: | 08.00 – 16.00 Uhr |
| Sonderpreis Mo-Fr. | 8.00 – 19.00 Uhr |
| Sonderpreis Sa. | 08.00 – 16.00 Uhr |
Links:
Karten:
Wetterlinks
https://www.meteoblue.com/de/wetter/woche/mering_deutschland_2871813
Wasserstand Paar: https://www.hnd.bayern.de/pegel/donau_bis_kelheim/mering-13201000
Webcam Mandichosee: https://www.addicted-sports.com/webcam/lechstaustufe/mandichosee/

Bei (Computer) Mäusen, just aber auch bei einem Fernglas festgestellt, die Gummierung klebt wie Hölle, da die chemische Verbindung sich über die Zeit änderte. Geholfen hat Sowohl 80% Ethylalkohol als auch Etikettentferner. Nicht 100%, an manchen Stellen bleibt ein leicht klebriges Gefühl, aber das Fernglas ist wieder benutzbar.


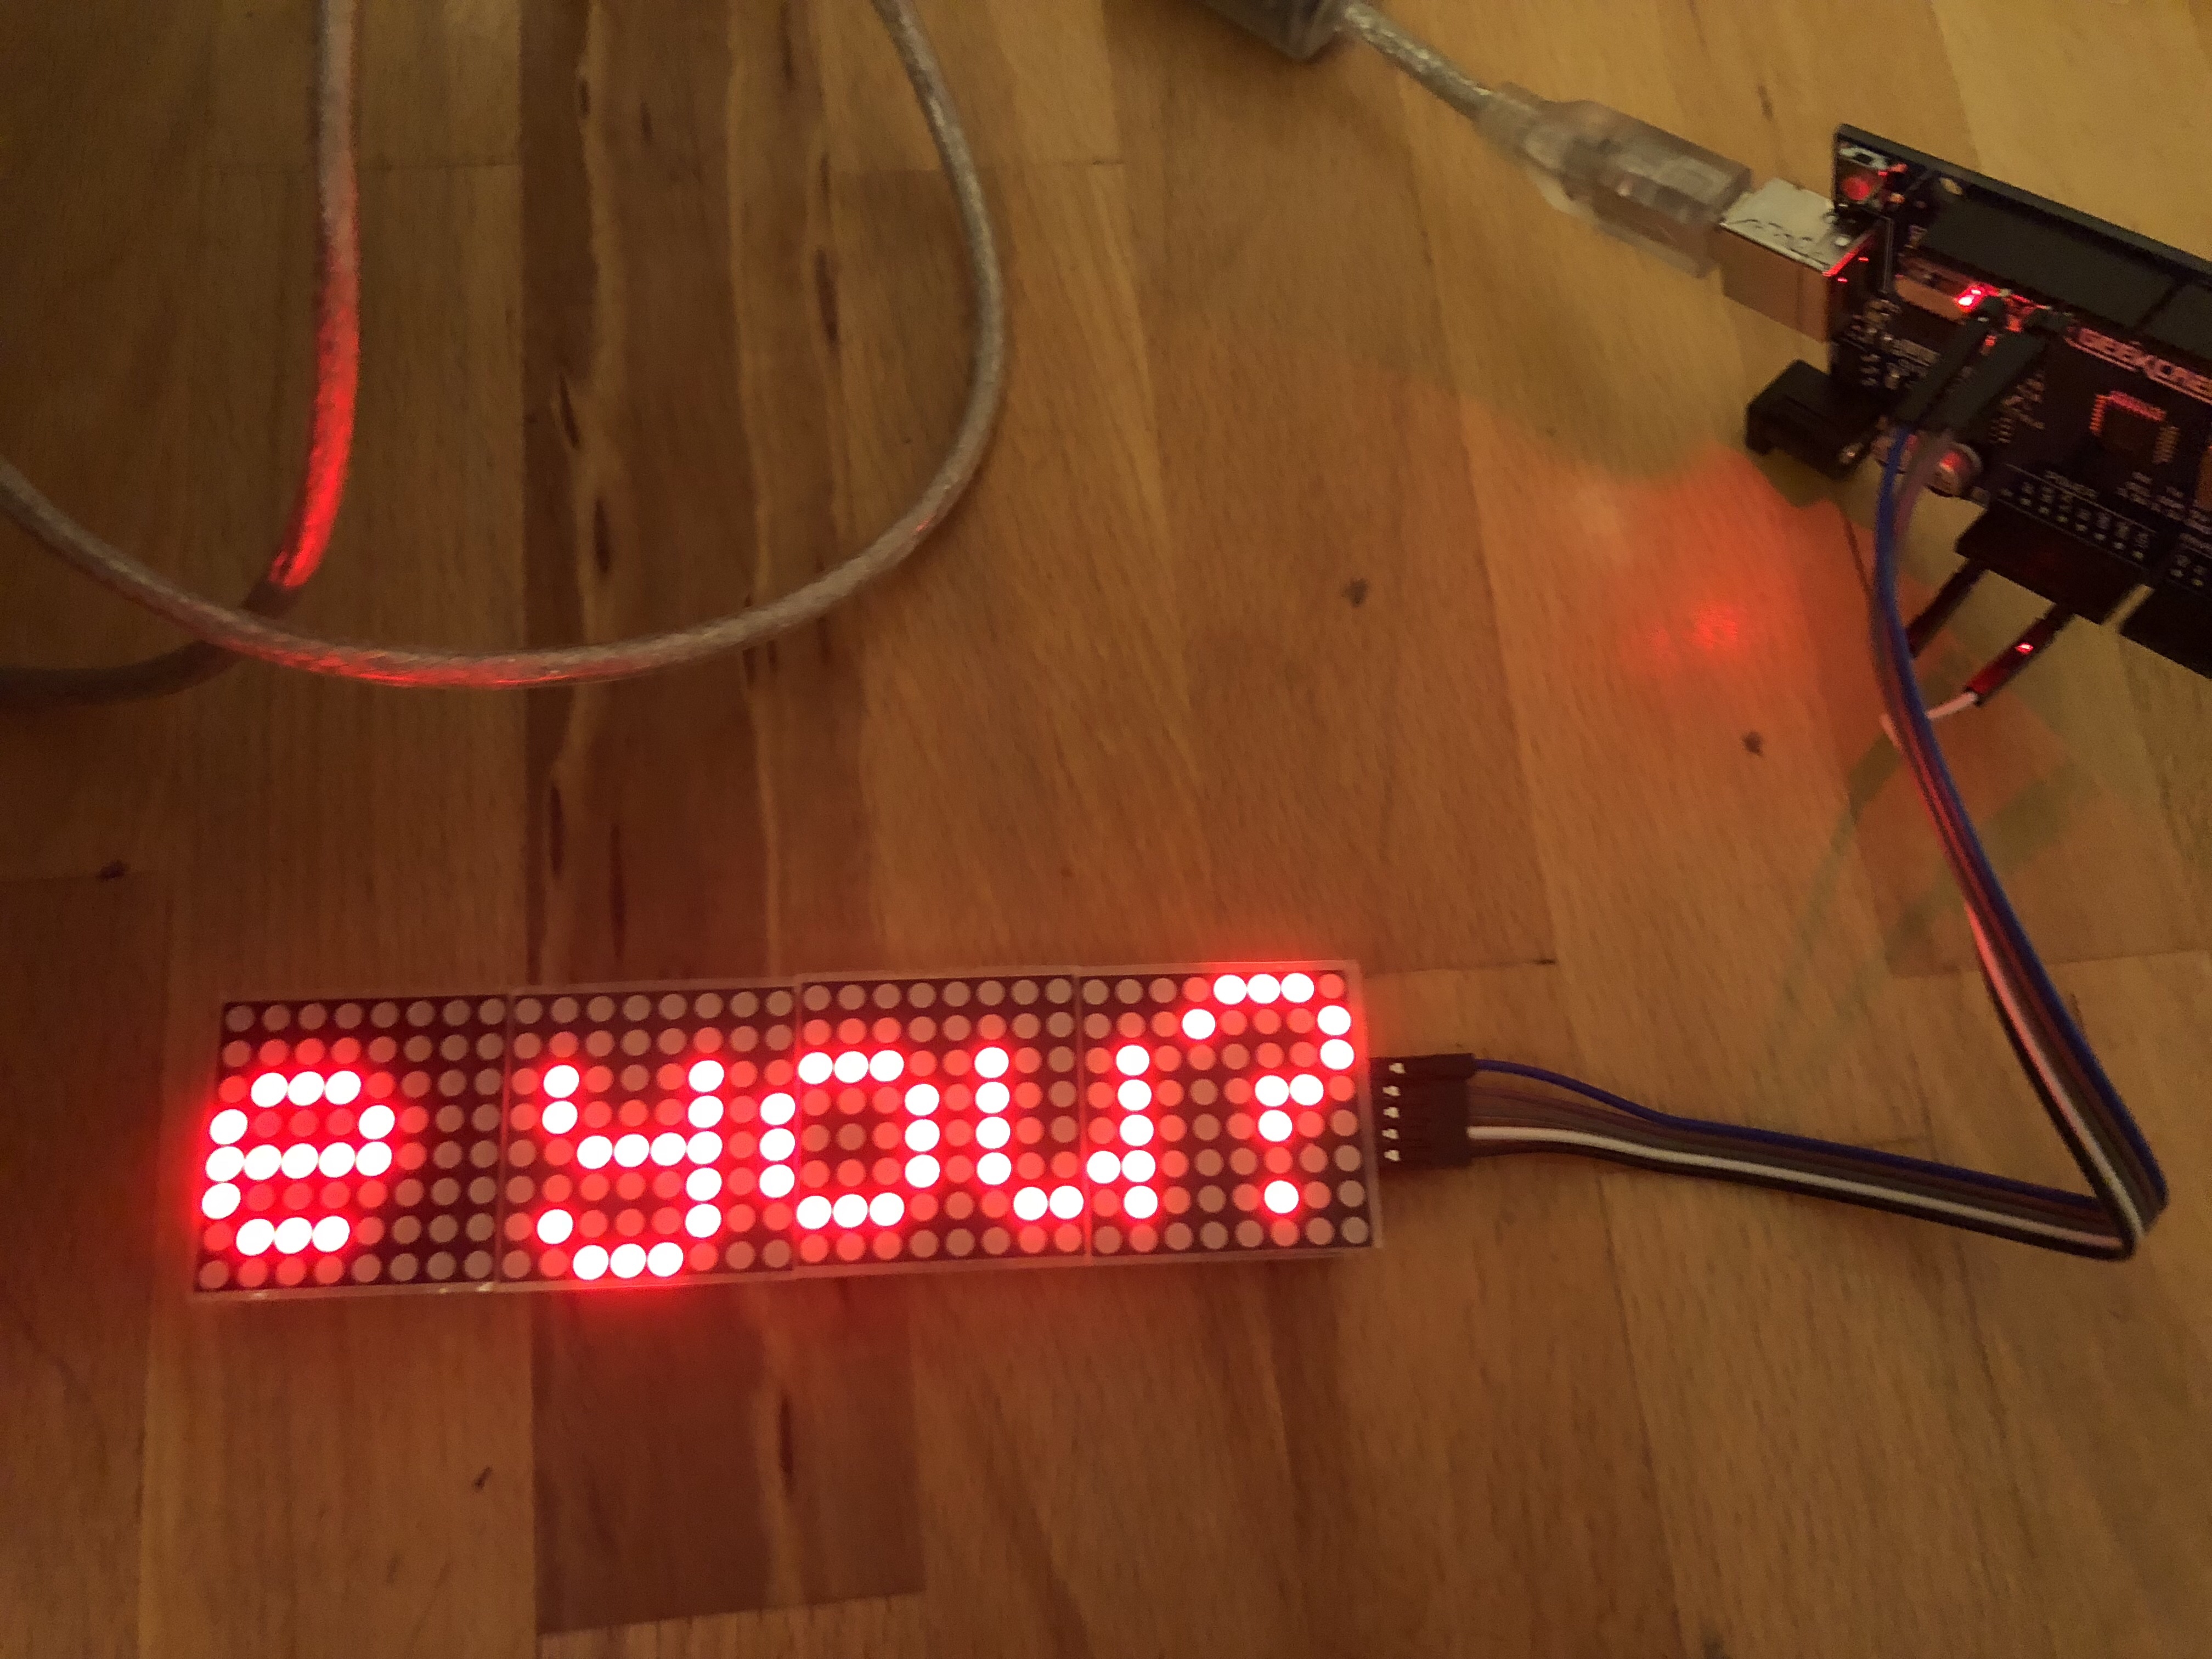
Good Libraries to use with the MAX7219 LED are:
https://github.com/MajicDesigns/MD_MAX72XX LED
https://github.com/MajicDesigns/MD_Parola Scrolling
You’ll find lot’s of examples after you install the libraries in the Arduino IDE.
How to solve problem with the LED matrix MAX7219 and the MD_MAX72xx.h Library
If you have problems with mirroring and/or orientation find following line and try following solutions, Choose one:
#define HARDWARE_TYPE MD_MAX72XX::FC16_HW


#define HARDWARE_TYPE MD_MAX72XX::PAROLA_HW


#define HARDWARE_TYPE MD_MAX72XX::GENERIC_HW


#define HARDWARE_TYPE MD_MAX72XX::ICSTATION_HW
Start with a headless raspberry, no need to connect monitor, keyboard: https://raspberrypi.stackexchange.com/questions/10251/prepare-sd-card-for-wifi-on-headless-pi
Find the raspberry in your router and connect with ssh. Useullay steps are:
sudo raspi-config
sudo reboot
(neu einloggen)
sudo apt-get update -y
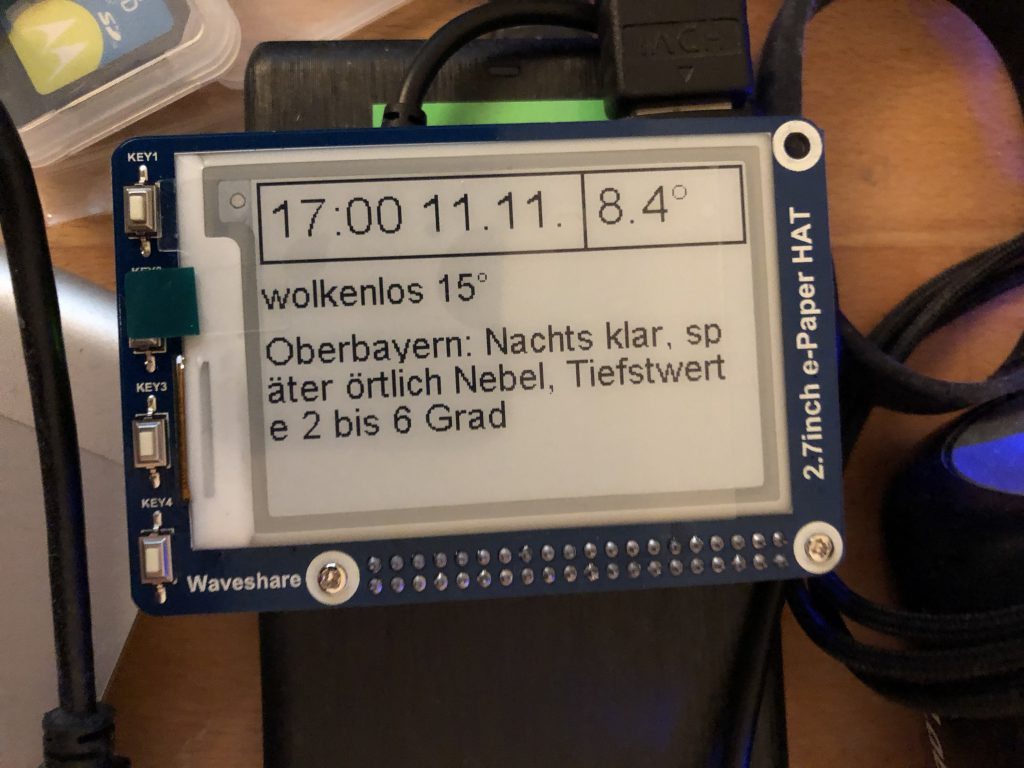
sudo apt-get upgrade -yHere’s some example python code for drawing text horizontal on the waveshare e-ink display. You’ll find also a example where to find the length of text where to break lines. This examples reads some small text from a web site and looks up a rss feed for the weather.
Install the fonts https://www.raspberrypi.org/forums/viewtopic.php?t=133772
sudo apt-get install ttf-mscorefonts-installer
Install libraries https://www.waveshare.com/wiki/Pioneer600#Libraries_Installation_for_RPi
sudo apt-get install git-core
git clone git://git.drogon.net/wiringPi
cd wiringPi
 ./build
https://www.waveshare.com/wiki/3.7inch_e-Paper_HAT


sudo apt-get install wiringpi
wget https://project-downloads.drogon.net/wiringpi-latest.deb
sudo dpkg -i wiringpi-latest.deb
gpio -v
cd
wget http://www.airspayce.com/mikem/bcm2835/bcm2835-1.59.tar.gz
tar zxvf bcm2835-1.59.tar.gz
cd bcm2835-1.59
./configure
make
sudo make check
sudo make install
sudo apt-get update
sudo apt-get install python-pip
sudo apt-get install python-pil
sudo apt-get install python-numpy
sudo pip install RPi.GPIO
sudo pip install spidev
sudo apt-get update
sudo apt-get install python3-pip
sudo apt-get install python3-pil
sudo apt-get install python3-numpy
sudo pip3 install RPi.GPIO
sudo pip3 install spidev

pip install feedparser
(Before running the API codes we provided, you should start up the corresponding core drivers of the interfaces. In the ready-to-use system image file, both I2C and SPI are set to Enable by default, but the serial port is still in the terminal debugging function mode.)
sudo raspi-config
Select Advanced Interface Options -> I2C -> yes, to start up the I2C core driver. Then you also need to modify the configuration file. Run the following command to open the configuration file:
sudo nano /etc/modules
Add the following two lines to the configuration file
sudo raspi-config
Select Advanced Interface Options -> Serial. Select the option no can disable the serial debugging function. And then, the serial port can be used for serial communication. And select the option yes can enable the serial debugging function. You should reboot the module to make the settings take effect.
sudo raspi-config
Select Advanced Interface Options -> I2C -> yes, to start up I2C core driver.
Code
# coding: utf8
##
 #  width 176
 #  height 264
 ##


import epd2in7
from PIL import Image
from PIL import ImageFont
from PIL import ImageDraw
import time
import urllib2
import feedparser
import datetime

def getLengthText(myTextInput, myFont, pixels):
    #font = ImageFont.truetype('/usr/share/fonts/truetype/freefont/msttcorefonts/comic.ttf', 28)
    #font = ImageFont.truetype("arial", 20)
    myText = myTextInput
    mlen = 0
    mlen = len(myText)
    w, h = myFont.getsize(myText)
    while pixels < w:
        myText = myText[0:mlen-2]
        mlen = len(myText)
        w, h = myFont.getsize(myText)
    return mlen

def addText(myImage,myText, myFont, xx,yy):
    #font = ImageFont.truetype('/usr/share/fonts/truetype/freefont/msttcorefonts/comic.ttf', 28)
    #font = ImageFont.truetype("arial", 20)
    w, h = myFont.getsize(myText)
    mask = Image.new('1', (w, h), 255)
    draw2 = ImageDraw.Draw(mask)
    draw2.text((0, 0), myText, font = myFont, fill = 0)
    mask = mask.rotate(90, expand=True)
    myImage.paste(mask, (xx,epd2in7.EPD_HEIGHT - w - yy ))

def main():
    epd = epd2in7.EPD()
    epd.init()

    image = Image.new('1', (epd2in7.EPD_WIDTH, epd2in7.EPD_HEIGHT), 255)    # 255: clear the image with white
    draw = ImageDraw.Draw(image)

    font = ImageFont.truetype("arial", 18)
    font2 = ImageFont.truetype("comic", 24)
    font3 = ImageFont.truetype("arial", 28)

    # get text from a feed
    #d = feedparser.parse('http://www.reddit.com/r/news/.rss')
    d = feedparser.parse('https://www.br.de/wetter/action/feeds/bayernwetter.do')
    dnr = 0
    dlen = len(d['entries'])
    #test
    oberbayern = 0
    for n in range(dlen):
        actentry = d['entries'][n]['title'].encode('utf-8').strip()
        print str(n) + " " + actentry[0:8]
        if actentry[0:8] == "Oberbaye":
            oberbayern = n
        #münchen
        if actentry[0:8] == "München":
            muenchen = n


    print d['entries'][oberbayern]['title'].encode('utf-8').strip()
    print d['entries'][muenchen]['title'].encode('utf-8').strip()
    nb = d['entries'][oberbayern]['title'].strip()

    # get text from a website
    ttext = "err"
    try:
            #response = urllib2.urlopen('http://4johannes.de/weather/lowest.txt')
            response = urllib2.urlopen('http://eiseler.com/perltest/tempmysqlcoldestblank.pl')
            ttext = response.read().strip()
            print(ttext)
    except:
            print("fehler2")
            ttext = "err2"

    # add to display

    # first Line
    grad = u'°'
    #entlang umgerechnet oben 1,1 nach 1,264/2
    draw.line((0, 264, 0, 0), fill = 0)
    draw.line((1, 264, 1, 0), fill = 0)
    addText(image, datetime.datetime.now().strftime("%H:%M %d.%m."), font3, 5, 6)
    addText(image, ttext + grad, font3, 5, 182)
    # horizontal unter der schrift:
    draw.line((38, 264, 38, 0), fill = 0)
    draw.line((39, 264, 39, 0), fill = 0)
    # senkrechte Linien, wenn quer gesehen
    draw.line((0, 264-180+5, 39, 264-180+5), fill = 0)
    draw.line((0, 264-180+4, 39, 264-180+4), fill = 0)
    draw.line((0, 263, 39, 263), fill = 0)
    draw.line((0, 262, 39, 262), fill = 0)

    draw.line((0, 0, 39, 0), fill = 0)
    draw.line((0, 1, 39, 1), fill = 0)


    muc = "München"
    mstr = d['entries'][muenchen]['title'].strip()
    mstr2 = mstr[mstr.find("):")+3:]

    xlen = 0
    xlen = getLengthText(mstr2,font, 264)
    mstr3 = mstr2[0:xlen]
    msRest = mstr2[xlen:]
    xlen = getLengthText(msRest,font, 264)
    mstr4 = msRest[0:xlen]

    addText(image, mstr3, font, 40, 0)
    addText(image, mstr4, font, 60, 0)
    #addText(image, "012345678901234567890123456789", font, 60, 0)

    print(nb.encode('utf-8'))
    xlen = 0
    xlen = getLengthText(nb,font, 264)
    nb1 = nb[0:xlen]
    nbRest = nb[xlen:]
    xlen = getLengthText(nbRest,font, 264)
    nb2 = nbRest[0:xlen]
    nbRest = nbRest[xlen:]
    xlen = getLengthText(nbRest,font, 264)
    nb3 = nbRest[0:xlen]
    nbRest = nbRest[xlen:]
    xlen = getLengthText(nbRest,font, 264)
    nb4 = nbRest[0:xlen]
    nbRest = nbRest[xlen:]
    xlen = getLengthText(nbRest,font, 264)
    nb5 = nbRest[0:xlen]

    print(nb1.encode('utf-8'))
    print(nb2.encode('utf-8'))
    print(nb3.encode('utf-8'))
    print(nb4.encode('utf-8'))
    print(nb5.encode('utf-8'))
    addText(image, nb1, font, 80, 0)
    addText(image, nb2, font, 100, 0)
    addText(image, nb3, font, 120, 0)
    addText(image, nb4, font, 140, 0)
    addText(image, nb5, font, 160, 0)
    #addText(image, "abcdef", font, 140, 0)
    #addText(image, "abcdef", font, 160, 0)


    epd.display_frame(epd.get_frame_buffer(image))
    # display images
    #epd.display_frame(epd.get_frame_buffer(Image.open('demopill2.bmp')))

if __name__ == '__main__':
    main()
From Isaac Sukin Command-line tip: replace a word in all files in a directory:
grep -lr --exclude-dir=".git" -e "oldword" . | xargs sed -i '' -e 's/oldword/newword/g'
VI:
Why I love VIM
cronjob: write to file:
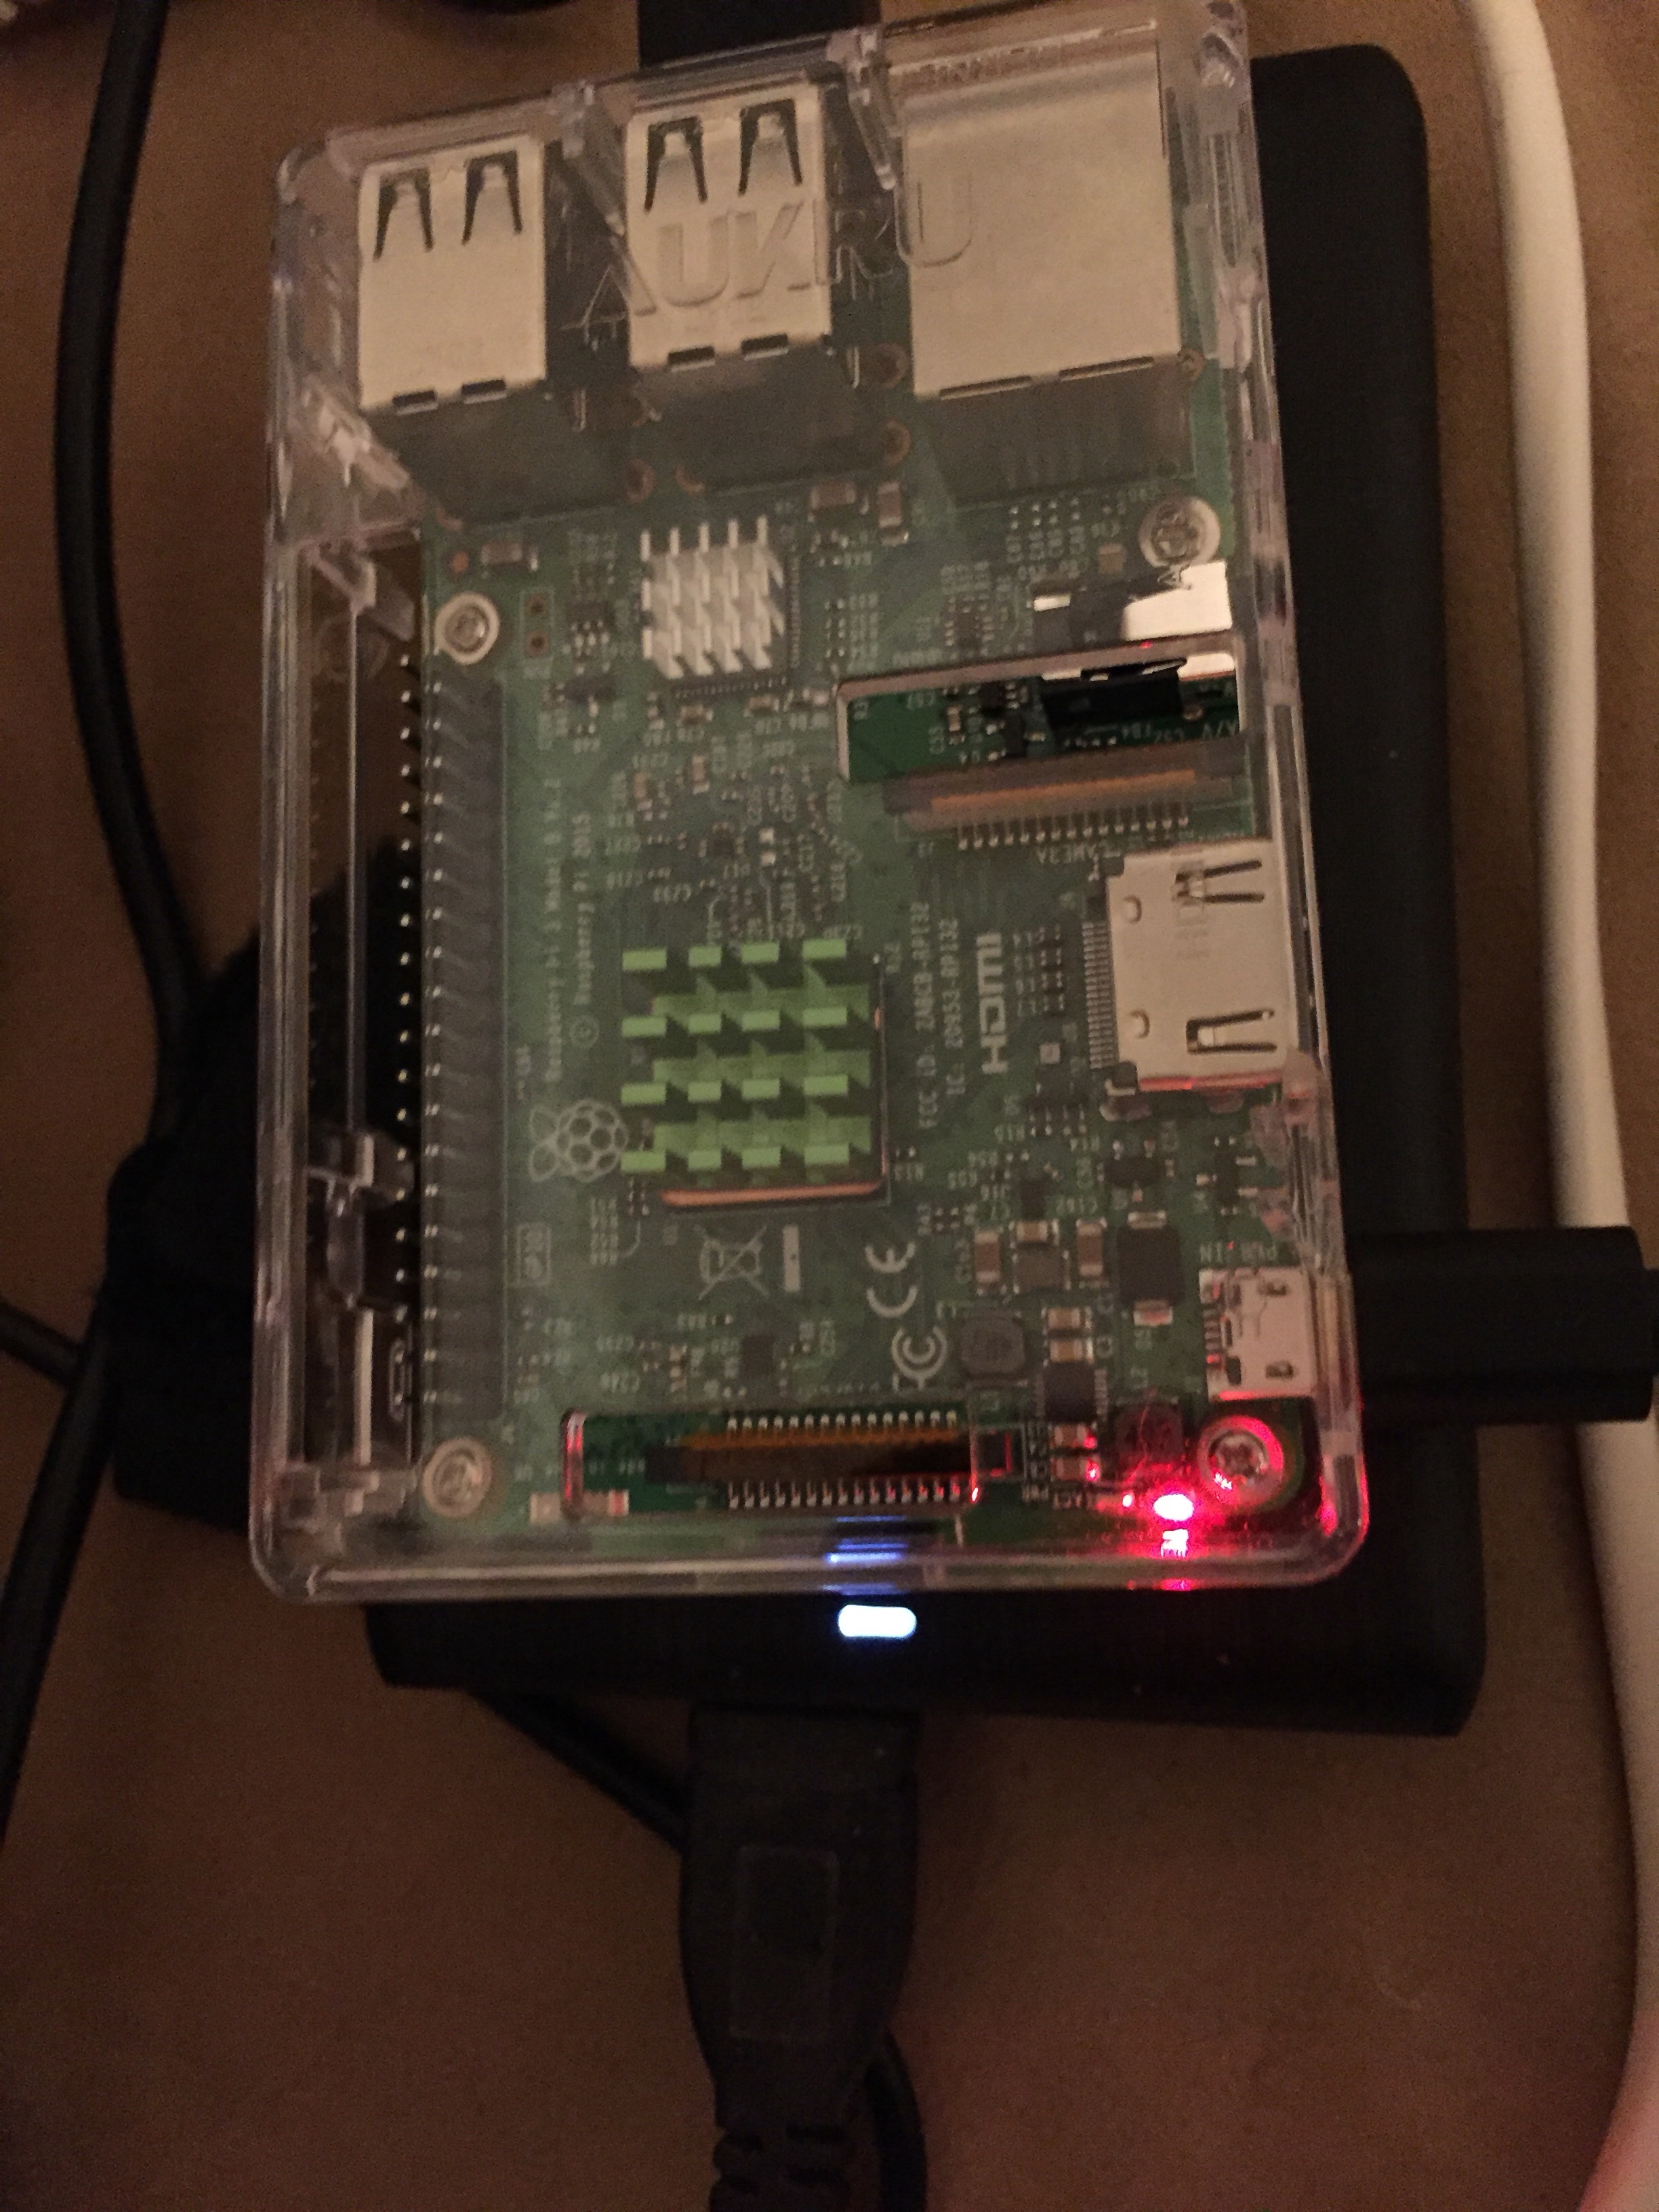
0 8 * * * /usr/local/bin/myjob > /var/log/myjob.log 2>&1Be warned, the Raspberry Pi with wlan is a slow nas. But I wanted to build one and there are no full instructions for it. So here are the steps to follow.
I used this instruction, but some things are missing and so I put everything down in short form:
Download the OMV Image here.
Use Etcher to flash it on SD card.
Insert card into raspberry, connect network cable. Wait (!) not only wait for the first time login, wait.. Raspberry upgrades in the background. Just do nothing(!) and wait more. About 10 to 40 min till the raspberry reboots again!
Now, login for the first time as root. Change Password.
Change Keyboard Layout if you don’t use english one:
dpkg-reconfigure keyboard-configurationcheck if your Wifi works:
ifconfig -aDo you see your wlan? If not, start at top.
Add your wifi with:
nmtui-connectagain:
ifconfig -aNow it could be a good idea to tell the router to fix the ip addresses.
sudo shutdown now
remove power
connect USB-Sticks, Harddisks, whatever. Be aware to use HD (also the 2,5) with their own Power(!).
Repower your raspberry.
And now first time to go to the OMV Web Interface.
Point your browser to one of the ip addresses.
Login admin/openmediavault
“System”
Change Password and Hostname in “System”
“Storage”
Format (Physical disks) then add Disk (file systems) in “Storage”
Select and Mount your Disk (file systems).
“Access Right Management”
Add a user in “Access Right Management”.
Add folder(s) in “Access Right Management”.
In “shared folders” mark folder and “give privileges” to your user.
“Services”
“Settings” -> Enable in “SMB/CIFS”
“Shares” -> add your folder
OK, now it’s the time to test your new nas. Go to your PC or Mac (smb://…your..ip…) and give it a try.
Neuere deutsche Anleitung: https://www.heise.de/tipps-tricks/Raspberry-Pi-als-NAS-verwenden-so-geht-s-4289165.html
Raspberry Pi, OpenMediaVault, NAS, Wifi, WLAN, error
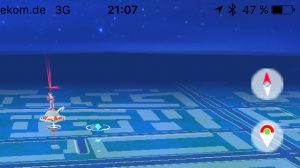
Dein Pokémon GO Plus funktioniert nicht mehr bzw. hat die Verbindung verloren? Das musste ich selber rausbekommen: Wenn man das Pokémon GO Plus zum ersten mal verbunden hat, findet man das Symbol im Kartenbildschirm. Was ich nirgends beschrieben fand: Ist das Symbol rot, ist alles ok. Ist es grau, wurde die Verbindung verloren. Was ist zu tun: Einfach auf das Symbol tippen und der Anleitung folgen, d.h nach dem Tippen den Knopf auf dem Pokémon GO Plus drücken. Danach solte es wieder verbinden. Bei mir tritt das öfters auf ..

Pokémon GO Plus, funktioniert nicht, Ärger, wie man wiederverbindet
Your Pokémon GO Plus doesn’t work anymore or lost connection? Had to figure this out by myself: After connection (found in instructions) you’ll find the Pokémon GO Plus Symbol in the map screen. Now: If it’s red, your Pokémon GO Plus is connected and works. If it is like greyed out, you lost connection. What to do? Tap on the Pokémon GO Plus Symbol in the map screen. You’ll receive instruction to push button on the Pokémon GO Plus. Voilà, it’s working again.
Pokémon GO Plus, not working, trouble, how to reconnect
Mein Vodafone Kabel Sagem Modem liefert keinen Ton mehr. Reboot half nicht. Was letztendlich half: Im Receiver-Menu, Ton, HDMI Dolby ausschalten.
Beim nächsten Auftreten half: Im obigen Menu hin und her, dann aus schalten. Und dann ein Reboot (vom Strom trennen).
Update: Tritt immer mal wieder auf. Zurzeit hilft, ausschalten, vom Strom trennen, und dann wieder vonv orne.
Suchbegriffe: Vodafone Kabel Ton geht nicht